“Ah, the Half Windsor knot, the secret weapon of well-dressed individuals everywhere. Tying your tie is a bit like crafting the perfect cocktail – it’s all about balance and a touch of finesse. So, if you’re ready to elevate your neckwear game, follow along as we unravel the art of the Half Windsor knot in nine easy sips… I mean steps.”

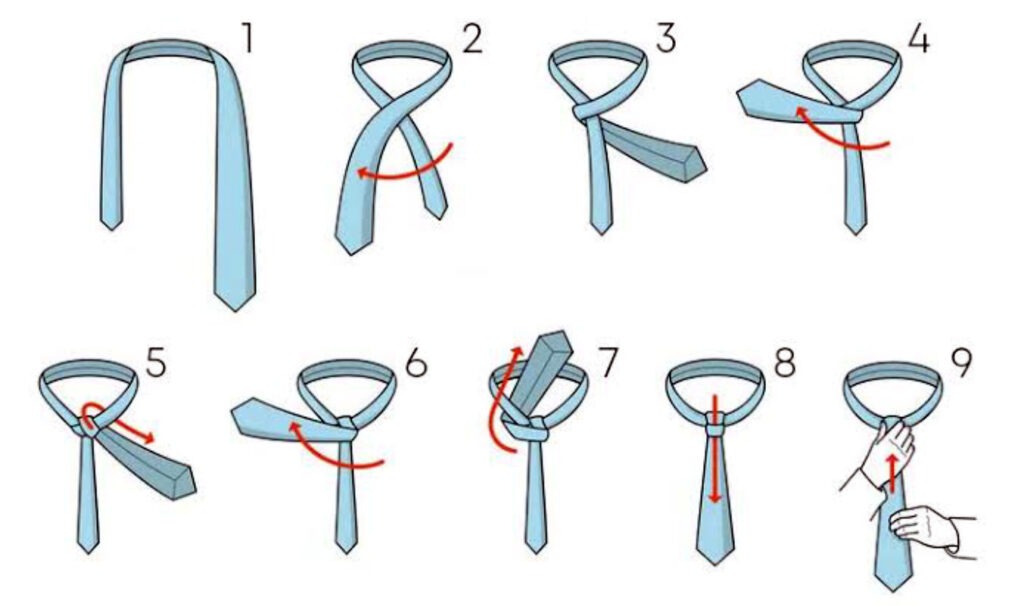
1: Start with the wide end of the tie on your right side and the narrow end on your left side. Ensure that the tip of the narrow end is just above your belt line.
2: Cross the wide end over the narrow end, forming an X shape just below your neck.
3: Bring the wide end behind the narrow end, moving from right to left.
4: Wrap the wide end around the narrow end, going from left to right this time.
5: Pass the wide end up and through the loop around your neck from underneath.
6: Cross the wide end over the front of the knot, moving from right to left.
7: Bring the wide end behind the knot, going from left to right.
8: Finally, pass the wide end up and through the loop around your neck from underneath once more.
9: Adjust the knot by holding the narrow end and sliding the knot up while gently pulling the wide end down. Make sure the knot is snug but not too tight.
Your Half Windsor knot is now complete! Adjust it as needed for the desired tightness and symmetry.